An Ultimate Guide to Create WorkForms in monday.com
Navigating data collection can be tricky, but monday.com WorkForms makes it easier. It is your go-to tool for combining all the elements of your routine workflow. In this guide, we will help you create WorkForms that streamline your data-gathering process.
Knowing how to set up these forms can help you stay organized, whether managing projects or assessing training needs. Learn about the complete step-by-step guide to accessing and customizing your forms. We will also examine conditional logic to make your forms more engaging and relevant. For example, this could be great for employee training assessments.
Before you follow this step-by-step, ensure you have a monday.com account. If you don’t have an account, don’t worry; you can sign up for a free trial in a minute. By the end of this guide, you will see how to integrate these forms quickly and smoothly into your monday.com boards, making data collection efficient and straightforward. Let’s get started!
10 Simple Steps to Create WorkForms in monday.com
1. Access the WorkForms Feature
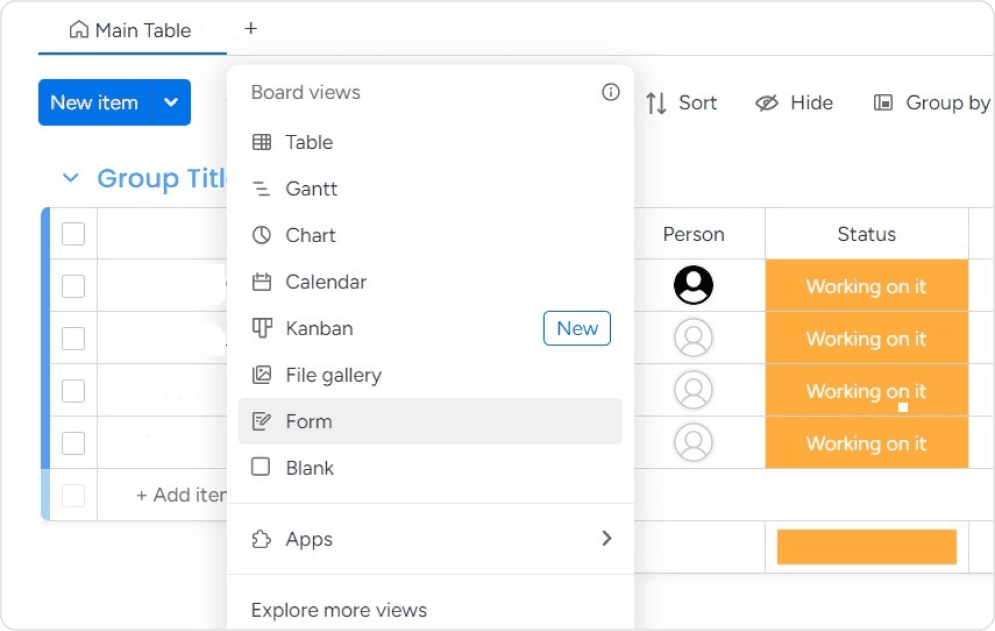
- Log in to your monday.com account.
- Navigate to the left-hand menu and click the “Work Forms” option.
- Alternatively, you can create a new form directly from a board by clicking “Add View” and selecting “Form.”
2. Set up the Form Structure
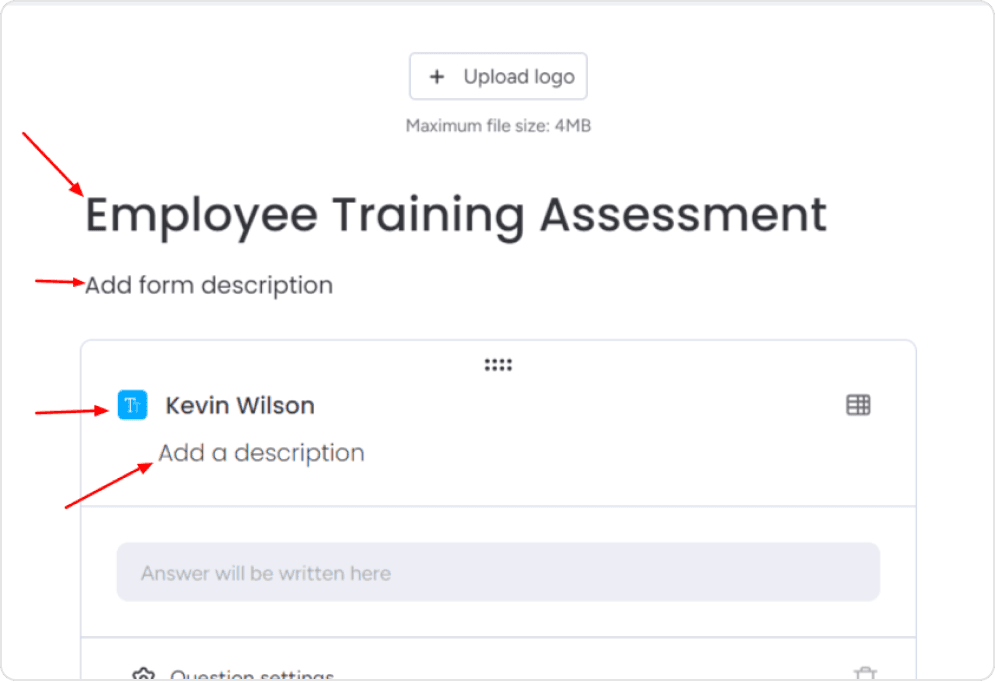
- Give your form a clear and descriptive title, such as “Employee Training Assessment.”
- Provide a concise description of the form to let users know its purpose.
- Add the first field for the user’s full name, and include an example to guide them.
- Make the full name field to ensure you have the necessary information.
3. Implement Conditional Logic
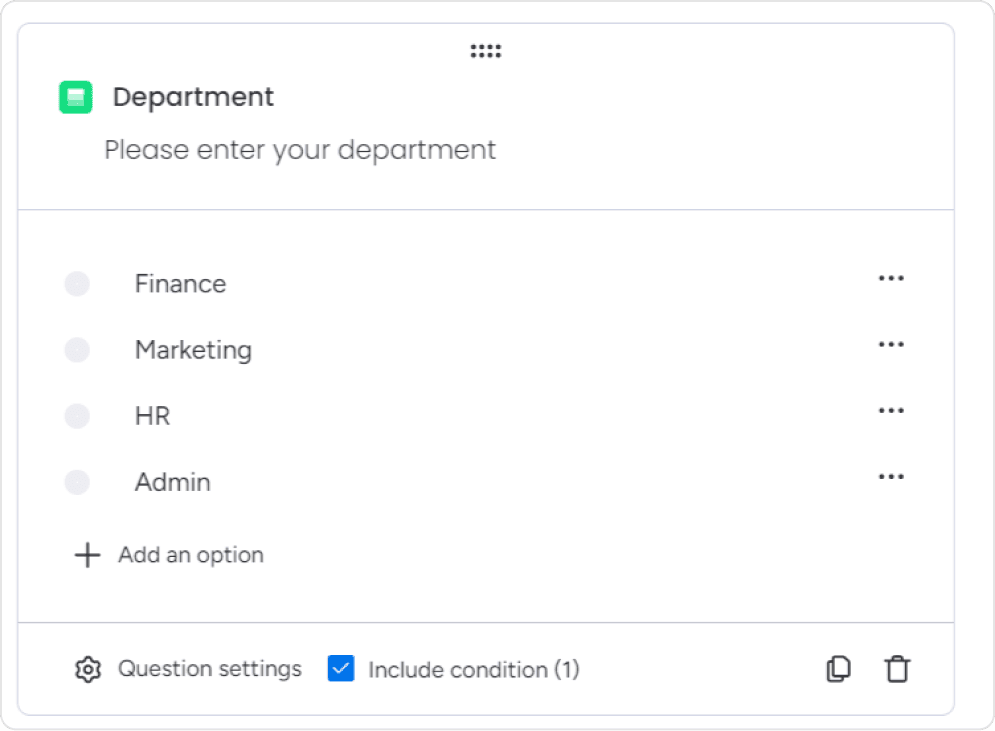
- Add a department dropdown field and provide clear instructions for the user.
- Set up conditional logic to display job title options based on the selected department.
– For example, if the user selects “Marketing,” display relevant job titles like “Content Writer,” “SEO Executive, and “Content Editor.”

- Continue adding conditional logic for other departments, ensuring a smooth and intuitive user experience.
4. Collect Training-related Information
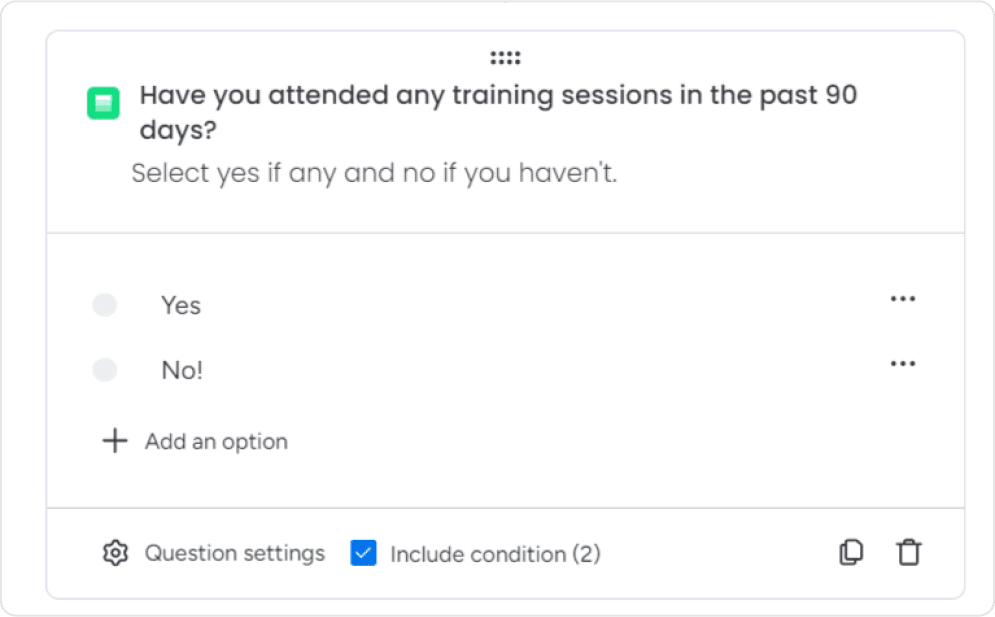
- Add a question to determine if the user has attended training sessions in the last 90 days.
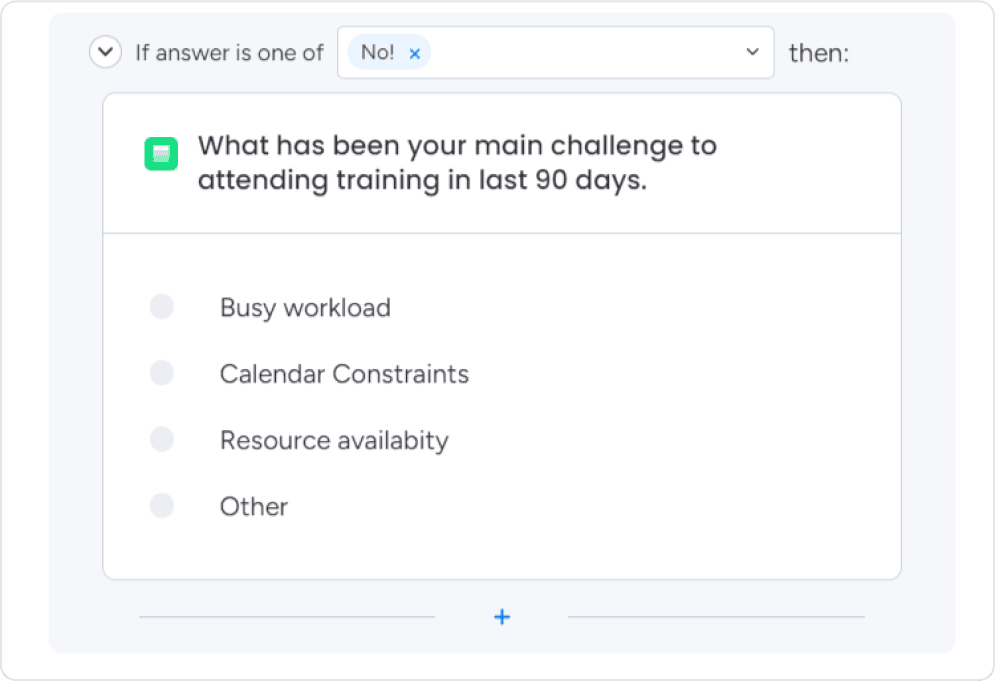
- Implement conditional logic to display different follow-up questions based on the user’s response:
– If the user selects “No,” present options for the main challenges or barriers they have faced in attending training.
– If the user selects “Yes,” ask them to list the specific training sessions they have attended.
Get More Done with Less Effort
Our experts help you maximize productivity and streamline workflows with ease.
5. Customize Training Delivery Preferences
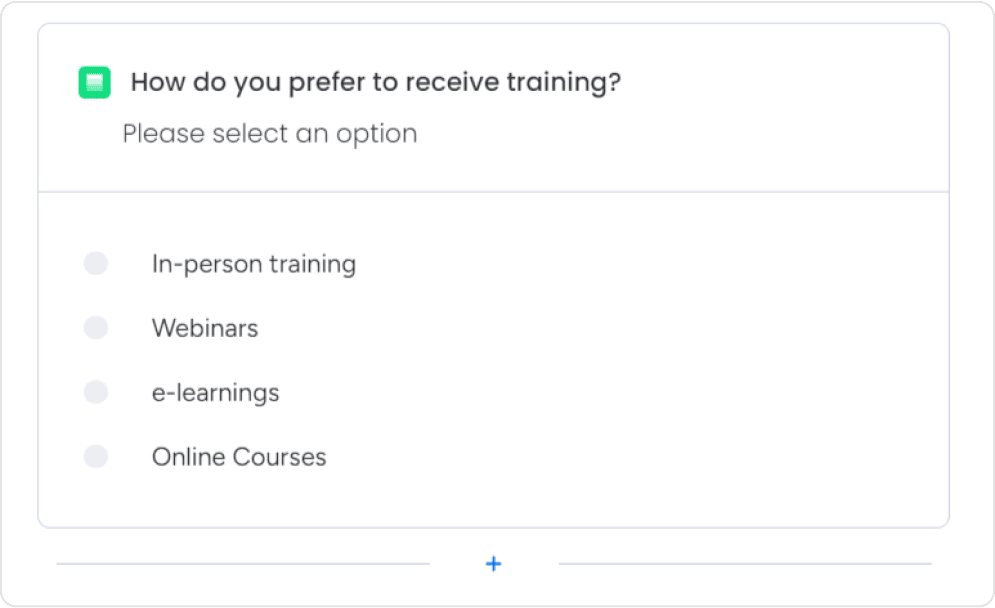
- Add a single-select field for the user to indicate their preferred training delivery method.
- Include options such as “In-person workshops,” “Webinars,” and “E-learning/Online courses.”
– If the user selects “In-person,” a multi-select field will allow them to select their preferred training location.

If the user selects “E-learning/Online,” include a multi-select field for their preferred training platforms, such as Udemy, edX, etc.
6. Gather Preferred Training Methods
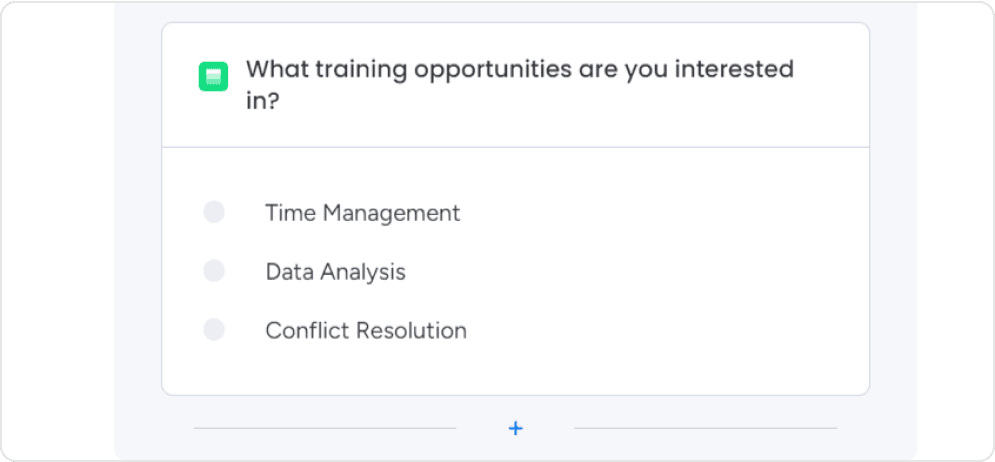
- Add a multi-select field for the user to indicate their preferred training opportunities.
- Provide clear instructions, such as “Select up to 3 training opportunities you are currently interested in.”
- Include options like “Conflict Resolution,” “Time Management,” and “Data Analysis”.
7. Determine Training Frequency Preferences
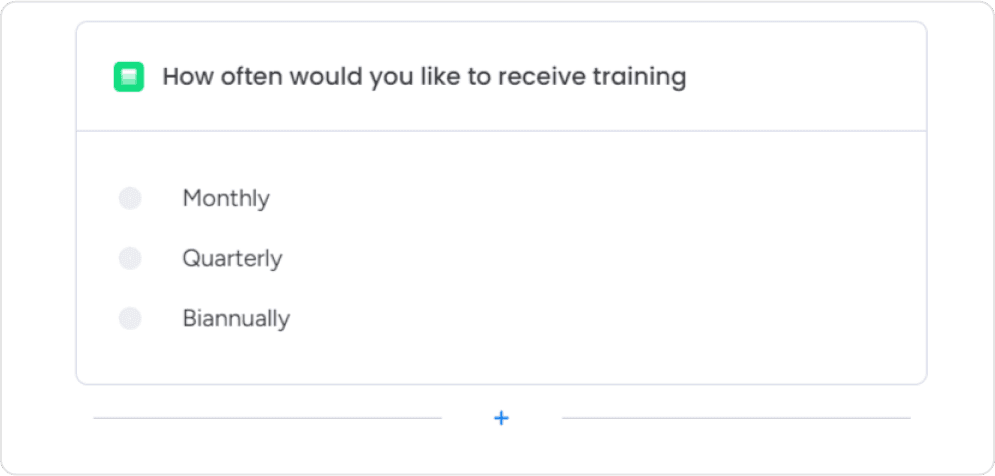
- Add a single-select field for the user to indicate how often they believe training sessions should be conducted.
- Include options like “Monthly,” “Quarterly,” and “Biannually.”
8. Collect Additional Feedback
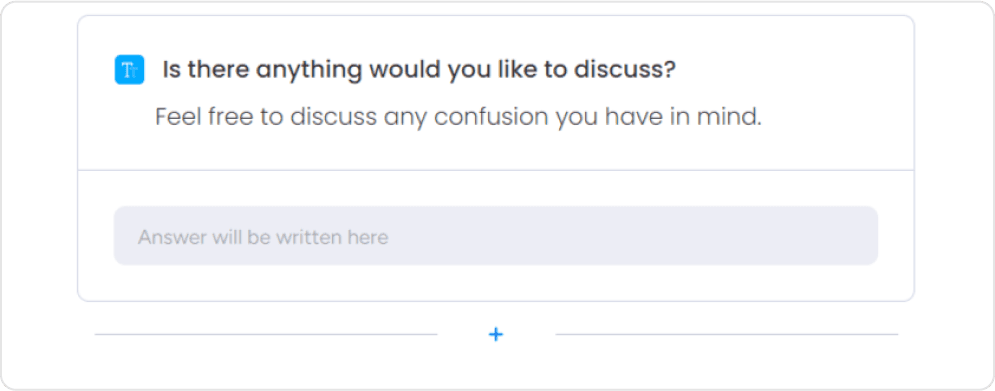
- Add a long-text field for the user to provide any additional feedback or information they want to share.
- Provide clear instructions, such as “Please feel free to provide any feedback or information you would like to share.”
9. Customize WorkForms appearance and settings
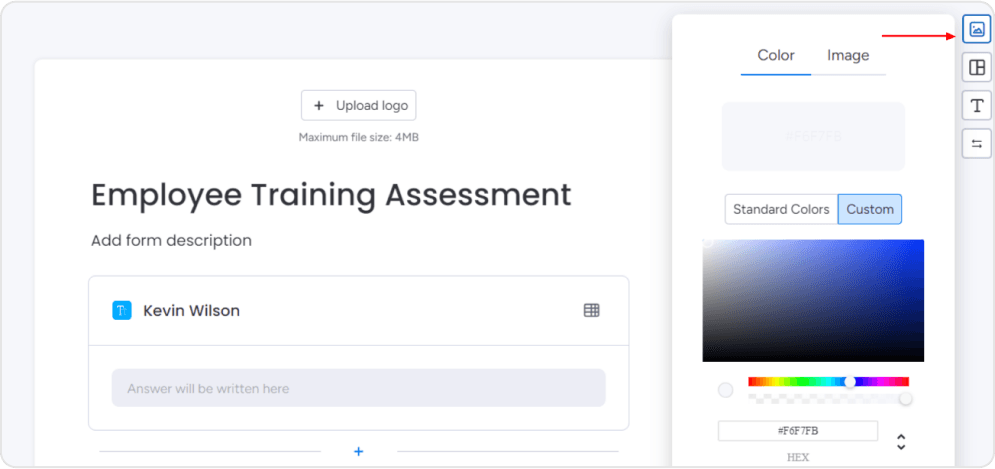
- Review the WorkForms and make necessary layout, color, and branding adjustments.
- Consider enabling form restrictions, such as allowing only one submission per user.
- Customize the thank-you message or redirect the user to a specific page upon form submission.
10. Integrate form submissions with monday.com
- Configure the form to automatically create new items or records in your monday.com board when a user submits the form.
- Ensure that the relevant data from the form, such as the user’s name, department, and training preferences, are correctly mapped to the corresponding columns in your monday.com board.
- (Optional) Add a “Date Created” column to track when each form submission was made.
Following these steps, you can create a comprehensive and user-friendly work form on monday.com to collect valuable data and insights from your employees or external users. Remember to test the form thoroughly and make any necessary adjustments to ensure a seamless experience for your users.
6 Tips to Customize monday.com WorkForms

Visual Customizations
1. Adjust the Form’s Color Scheme
Align the form’s color scheme with your brand’s identity to create a cohesive visual experience for users. Select the “Color” option in the form editor to access the palette. Choose colors that match your company’s branding guidelines, whether a bold primary color, complementary accents, or a more subtle neutral palette. This attention to visual consistency will make the form feel like a natural extension of your brand.
2. Incorporate Your Logo and Branding Elements
Elevate the form’s appearance by adding your company’s logo or other branding assets. In the form settings, navigate to the “Image” section and upload your logo. You can adjust the text styles, font, and size to ensure the form aligns with your brand’s visual identity. These small customizations can make a big difference in how users perceive and engage with your WorkForm.
3. Optimize the Layout and Structure
Carefully consider the organization and flow of your form fields to create a visually appealing and user-friendly experience. Experiment with different layouts, such as single-column or side-by-side arrangements, to determine the most intuitive arrangement for your users. Adjust form elements’ spacing, alignment, and grouping to improve aesthetics and scalability.
Functional Customizations
1. Leverage conditional logic for personalized experiences
Enhance the functionality of your WorkForm by implementing conditional logic. This allows you to display or hide fields based on the user’s previous responses, guiding them through the form in a more personalized and efficient manner. In the form settings, enable the conditional logic feature and configure the rules for each field. This can help reduce user frustration and ensure you collect the most relevant information.
2. Optimize the user experience with instructive fields
Provide clear instructions and examples within your form fields to help users understand exactly what information you seek. Use the “Description” option to add contextual guidance, and consider including sample text or formatting requirements to set appropriate user expectations. This attention to detail will result in higher-quality responses and reduce the need for follow-up communications.
3. Integrate advanced features for increased efficiency
Explore the advanced features available in monday.com WorkForms to streamline your data collection process. For example, the multi-select option allows users to choose multiple preferred training locations or learning platforms. You can also leverage the long-text field type for open-ended questions, giving respondents ample space to share detailed feedback or additional information.
By implementing these visual and functional customizations, you can create WorkForms that align with your brand’s identity and deliver a seamless and efficient user experience. Remember to test your form thoroughly and gather feedback to continually optimize its performance and meet the needs of your audience.
Troubleshooting Common Issues with monday.com WorkForms
Issue 1: Conditional logic not functioning as expected
Solution: Verify the setup of your conditional logic rules.
1. Review Conditional Logic Configurations: Ensure the conditions you set up are properly defined, and the trigger actions are correctly linked to the appropriate follow-up questions or fields.
2. Test Conditional Logic: Preview the form and systematically test each conditional logic scenario to ensure the expected behavior occurs.
- Try selecting different options in your drop-down or multi-select fields to verify that the conditional questions or options are shown/hidden as intended.
- Ensure that any nested conditions are also working as expected.
3. Check Field Associations: Confirm that any fields referenced in your conditional logic rules are correctly associated with the corresponding form elements.
4. Review Field Types: Use the appropriate field types (e.g., single-select, multi-select, long text) to support the conditional logic you want to implement.
5. Publish and Retest: After making any changes, republish the form and retest the conditional logic to verify that it functions as desired.
Issue 2: Integrating form submissions with monday.com Workflows
Solution: Configure the form to automatically create new items in your monday.com board.
1. Enable the “Create Item” Option: Within the form settings, locate the “Create Item” option and turn it on.
2. Map Form Fields to Board Columns: Assign each form field to the corresponding column in your monday.com board.
– This will ensure that the data submitted through the form is automatically synced to your board.
3. Customize Item Creation Settings: Adjust the item creation settings as needed, such as:
- Selecting the board and group where new items should be created.
- Configuring the status or other default values for new items.
4. Test the Integration: Submit a test form and verify that the new item was created correctly in your monday.com board, with the expected data populated.
Issue 3: Collecting sensitive information through monday.com WorkForms
Solution: Implement security and privacy measures to protect user data.
1. Restrict Form Access: Utilize the “Restrict Form Access” option to limit who can view and submit the form. You can require users to be logged in to monday.com or specify a list of authorized email addresses.
2. Make Form Anonymous: Enable the “Anonymous” setting to allow users to submit the form without providing their name or other identifying information.
3. Secure Form Data: Ensure that any sensitive data collected through the form (e.g., personal information, financial details) is properly secured and stored according to your organization’s data privacy policies.
4. Provide Privacy Disclosures: The form should include clear privacy statements and data usage guidelines so users understand how their information will be handled.
Before deploying the form to your users, thoroughly test the security and privacy measures to ensure they function as expected.
Conclusion
This comprehensive guide taught us the powerful capabilities of monday.com’s WorkForms feature. You can create customized data collection tools that streamline your workflows and provide valuable insights by leveraging clear instructions, intuitive conditional logic, and strategic form design.
Whether you’re looking to gather employee training preferences, conduct customer surveys, or manage job applications, monday.com’s form creation capabilities make it easy to collect structured data and integrate it seamlessly with your existing boards and processes. You can ensure your forms deliver maximum effectiveness by implementing best practices like using clear question phrasing, organizing a logical flow, and testing user-friendliness.
As we’ve demonstrated, monday.com WorkForms’ flexibility allows you to build forms that adapt to your unique business needs, from department-specific job title options to branching question paths based on user responses. Mastering these customization strategies will empower you to enhance productivity, drive adoption, and make data-driven decisions that move your organization forward.
Optimize Your monday.com Workflows with Powerful WorkForms
Are you familiar with creating WorkForms on monday.com? It’s time to implement it into your existing workflows to improve data collection and streamline processes.
Editor's Choice

How Much Does monday.com Cost? A Complete Breakdown of Plans
What is monday.com? How Can It Be Your Team’s Greatest Asset?

The Ultimate List of Project Management Software for Individual Users
